
We all know the classic Bahtinov mask: it allows to focus a bit more objective compared to visual star focusing.
The Bahtinov will produce Cross-shaped stars, with one clear line that moves along the cross as you focus. When the line is centered in the cross, you should have achieved perfect focus.
So what is the tri-Bahtinov?
It essentially three Bahtinov masks in one, rotated over 120 degrees. It gives you three lines and three crosses to check collimation, along three axis simulteaneously.
In addition to focussing, the tri-Bahtinov also indicates collimation status along three axis.
This is interesting for e.g. Schmidt-Cassegrain telescopes, where the collimation is done by push-pull screws of the secondary mirror along three axis. To know which collimation screw to handle, it’s best to position the tri-bahtinov in line with the three screws.
When you position the tri-Bahtinov alongside these axis, it will give you insight not only per axis of the focus, but also how different the focus position is for each axis.
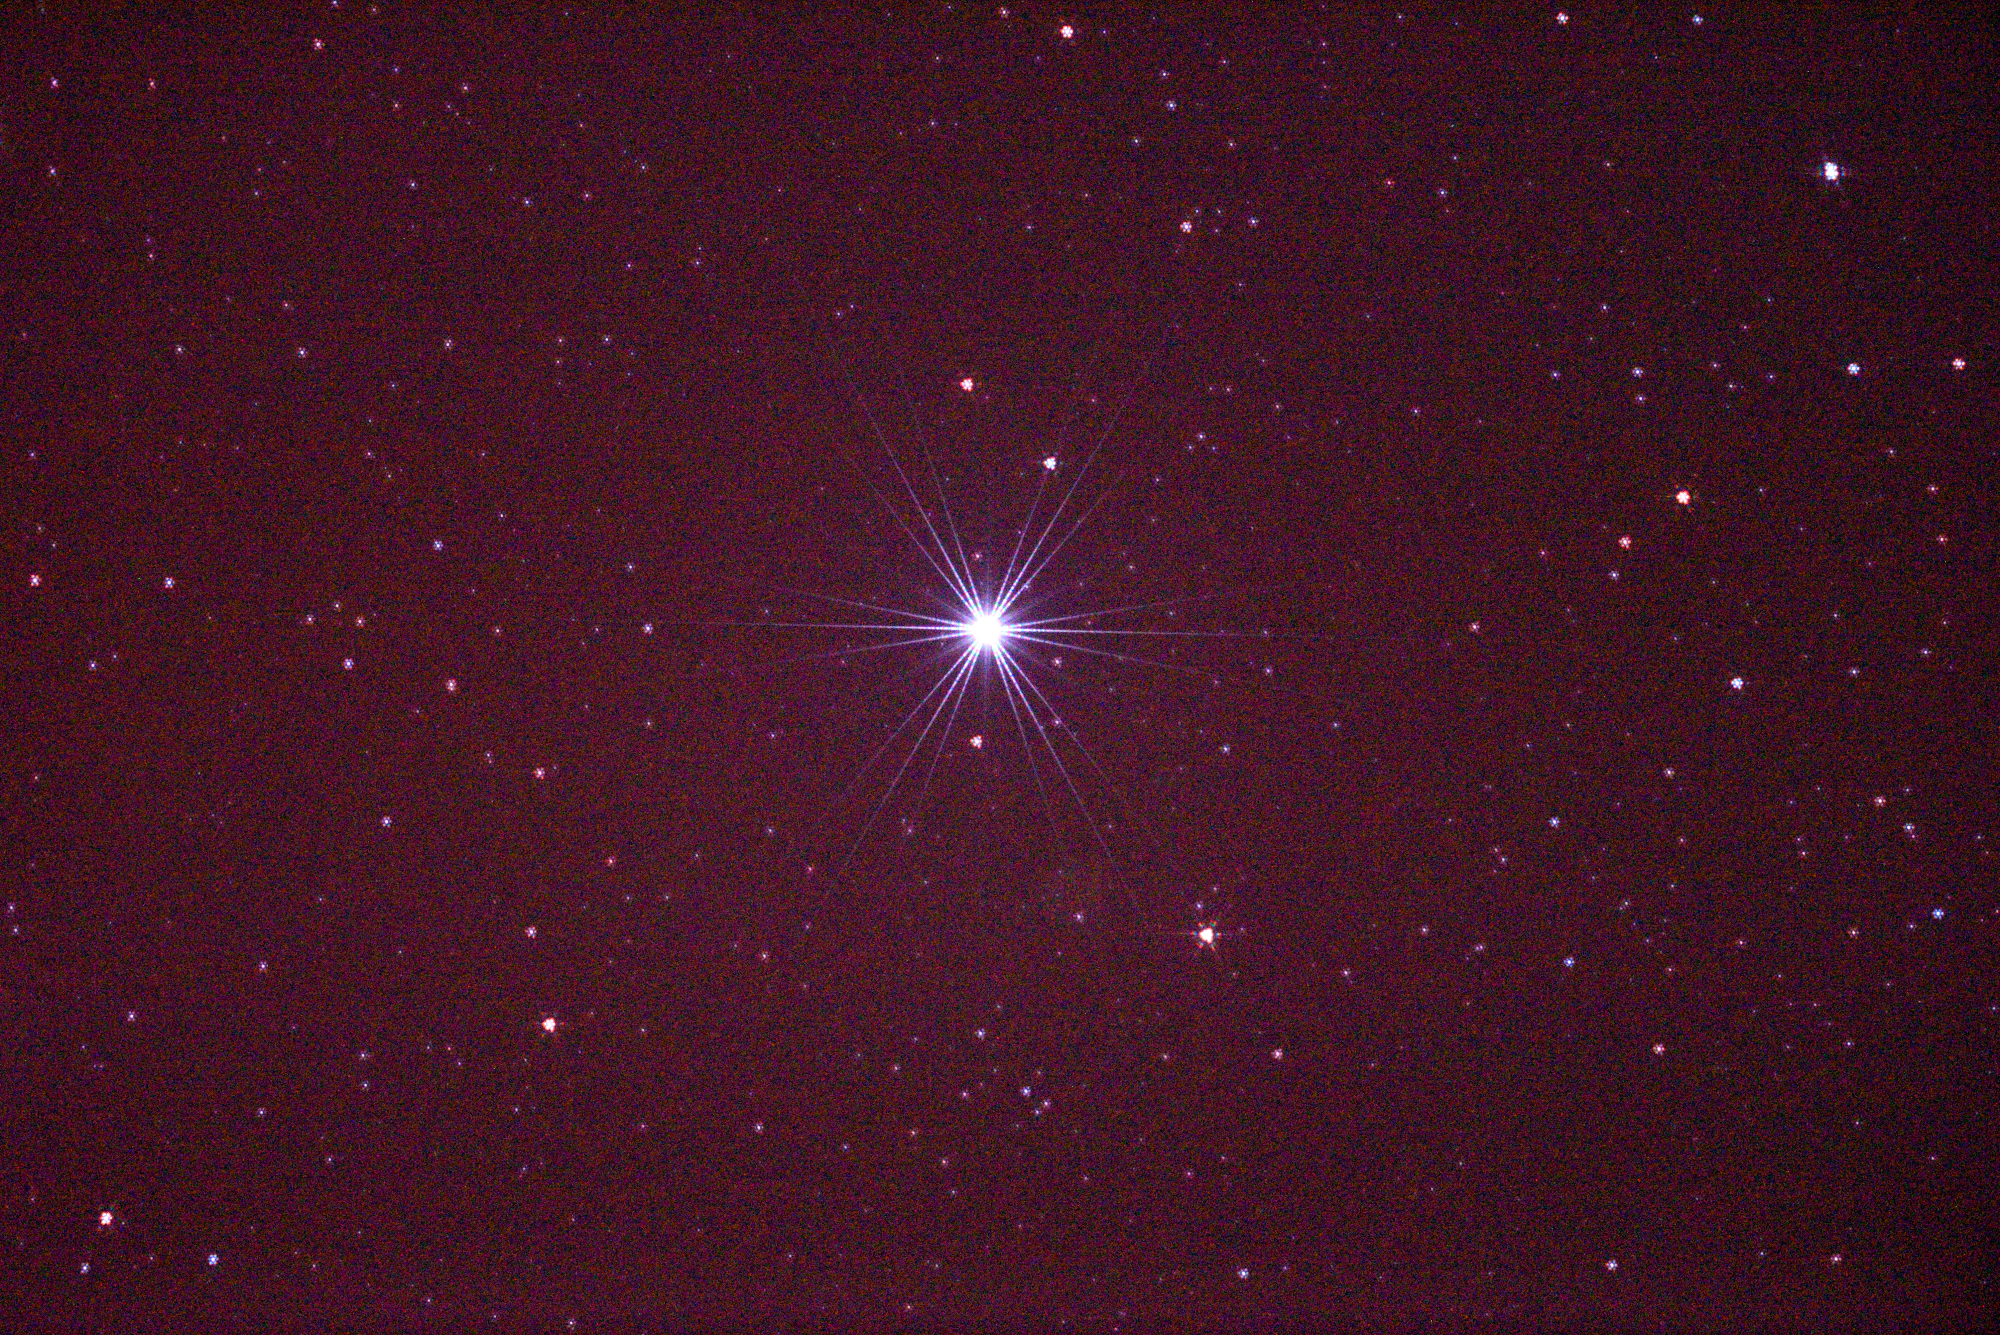
A picture of a star using the tri-Bahtinov and the ASI174 Webcam. Very slight disalignement is visible.
You could basically do the same by turning your classic Bahtinov at 120° angles and check focus each time per individual axis. However, all three axis need to be in line at the same time. And that ‘s not easy when turning 120¨° and seeing one position at the time only.
Do I use the tri-Bahtinov very often? Maybe yes. I believe it’s a great final check for an SCT. It will disclose the slightest error in collimation. For every day use, especially with an SCT that is moved along and mounted for each session, it’s good to check collimation this way. Especially when the scope doesn’t hold it’s collimation very well.
The test with the tri-Bahtinov is rather sensitive, as is shown by turning a collimation screw very very slightly (like 10°): this will become visible in the picture instantly.
I used a lasercutter at the KU Leuven to create the mask based on a vector graph generated with the mask generator: http://svg2.mbsrv.net/astro/Tri-Bahtinov.html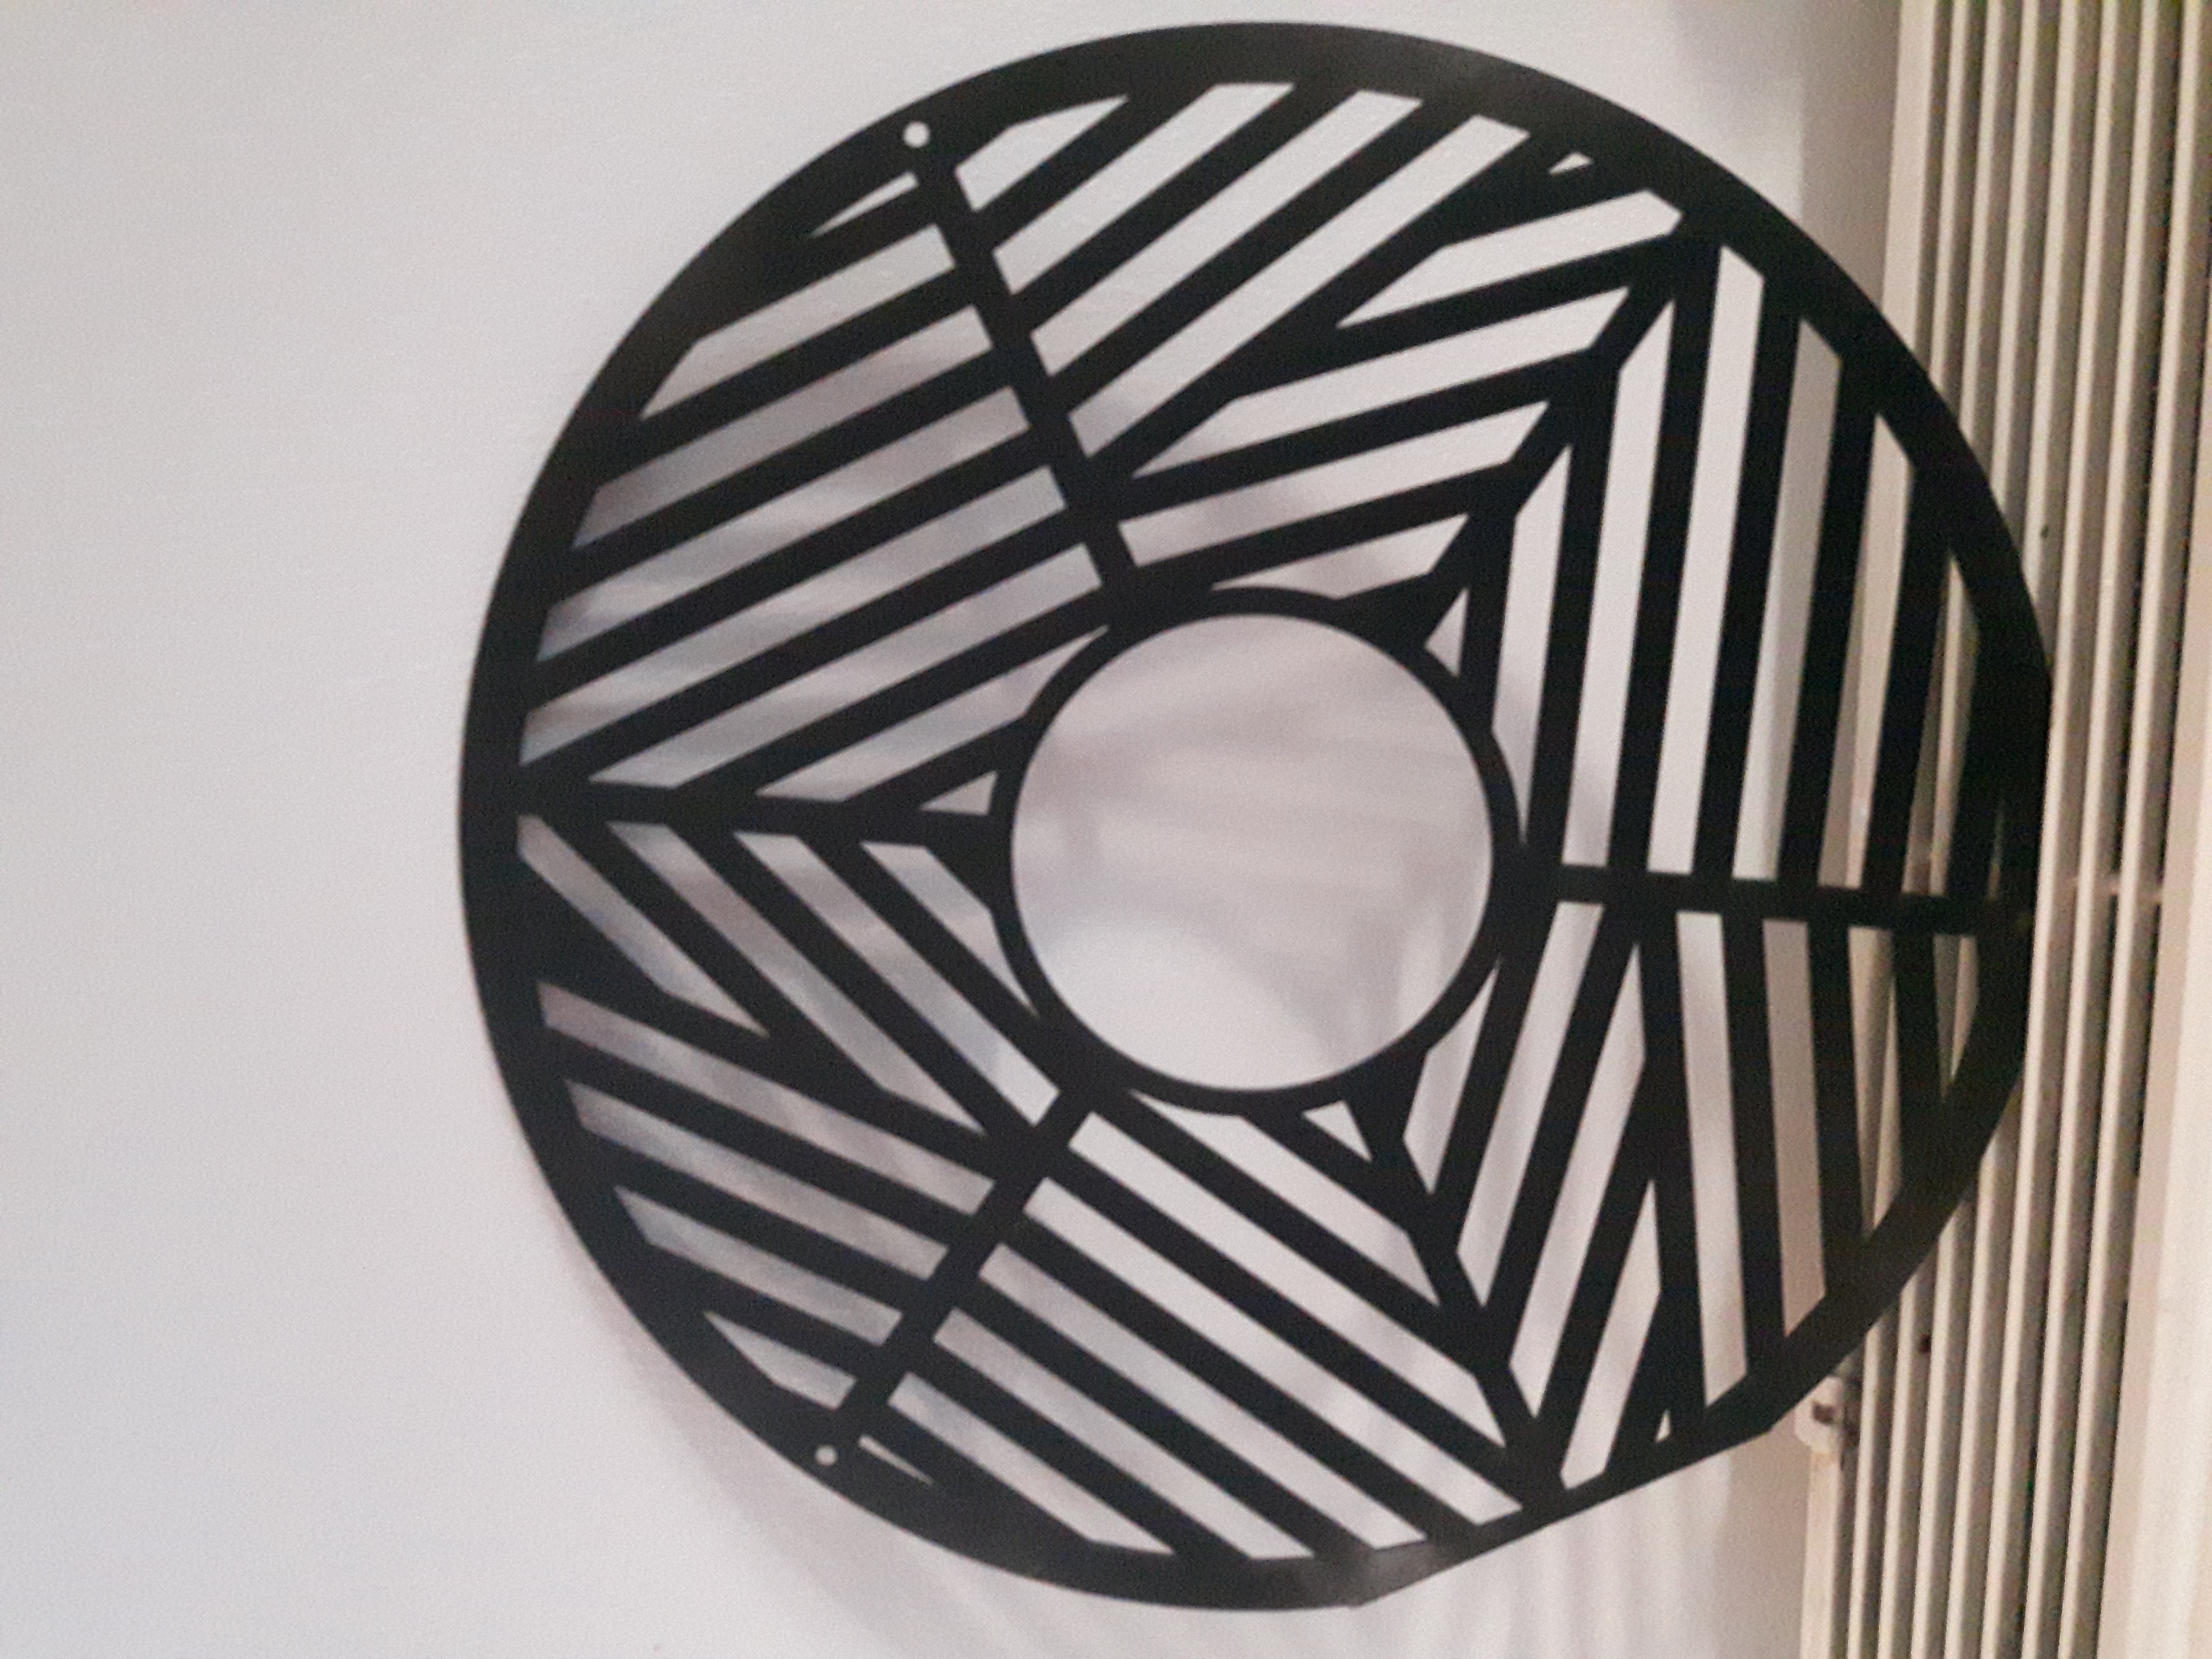
To collimate the SCT, you follow the following generic process:
- collimate for concentric shadows on an out-of-focus star disk
- focus closer and collimate again as in the first line
- defocus slightly almost to focus, look for irregularities and collimate again as above to have eccentricities to disappear
- when seeing allows you can check the airy rings, and collimate again to make those go around the disc
The last 3 steps require very small turns on the collimating screws.
- With the tri-Bahtinov you repeat step 1 and 2 put on the mask and focus till one of the three pairs of beams is in focus
- check by blocking the light of each section (1 out of 3) which line is in focus
- use one of the two other collimation screws to focus (one of) the other beams
- repeat till the image is totally balanced
See also the next post on the sensitivity of a tri-bahtinov mask:
Check out: https://github.com/cytan299/tribahtinov
A second version of the Bahtinov with improved sensitivity:
http://svg2.mbsrv.net/astro/tribm_sim2/tbmReport.html
More discussion on Thri-Bahtinov and sensitivity:
https://www.cloudynights.com/topic/620807-tri-bahtinov-mask/
This is what happens if you forget to remove your Bahtinov during imaging.